## Elastic Beanstalk --> 애플리케이션 생성
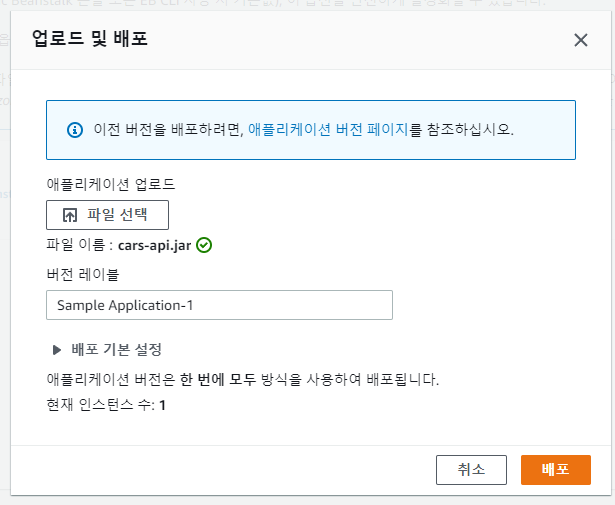
- .jar 파일 수동 업로드 배포 성공


## GUI 환경이 아니므로, Postman 에서 설정후, 테스트
==============================================
So let's get started using the A.W. has been stopped from the AWB management console.
You can either search for service here or click on all services you'll see to the list of services is
quite long.
What we are needing is computing power.
So for that reason, we are going to look under compute or elastic Bienstock.
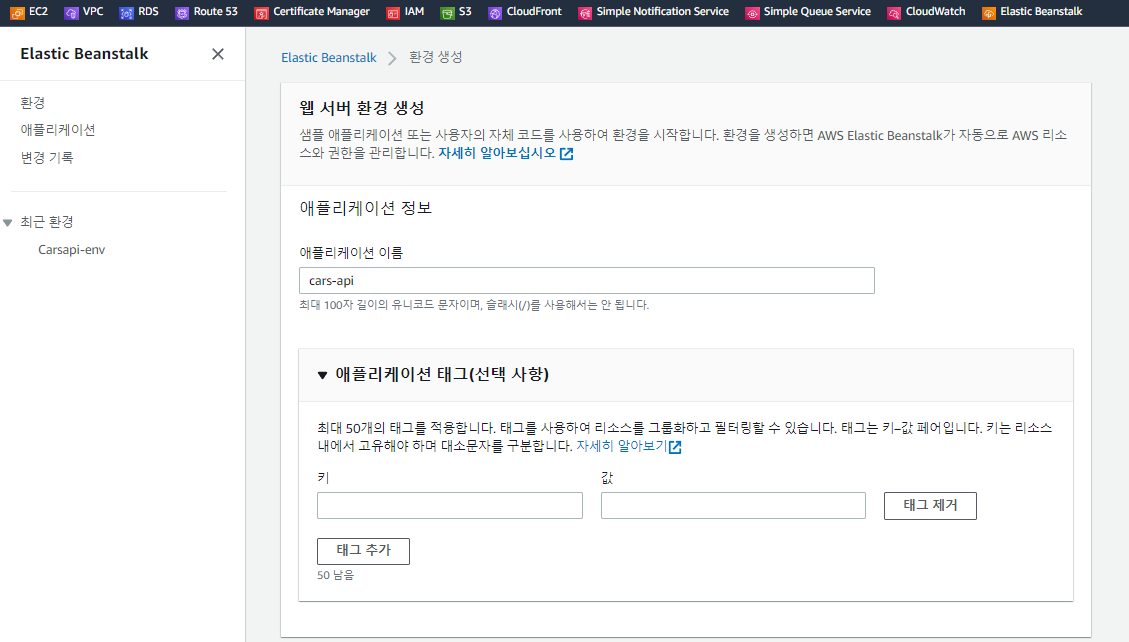
They're going to create a new application, and it's called this application API.
And click on Create.
Or application will need an environment in order to run.
So for that, we're going to create a new environment.
This will be a Web server environment because we have this API that works over HTP.
And then called the environment, named production.
Or leave the domain as it is, because it will be automatically generated and in the pre configured
platform.
I will select as this is a Java application.
When it comes to the application code, which going to start with a simple application just to see how
this environment works, I'm going to click on Create Environment and let AAUW start this application.
Once the environment has been launched and application deployed, you should see this overview page
well, it says that the health is a key indicator that everything has been correctly deployed.
And right here on tap, you will see that you are L4 where the application was deployed.
So if you click on, it will be taken to this page where you see the application.
This is not the application that we wanted to deploy.
This is something that is provided by AWB, but it just shows how this thing works.
Now, eventually, we wanted to deploy our job application.
So for that reason, I'm going to go here to upload and deploy and I'm going to select the jar file.
That is the output of the bid process.
If you don't have the jar file locally in your computer, you can check the resources folder and get
the jar file from there.
After I selected the final, I will deploy.
This will upload a new application version and will deploy it on the instance that we have created,
this will take again a few minutes, but after that we should see the result.
And then we have the indication that the application has been successfully deployed and we can start
looking at it now as this is an API, it doesn't have a graphical interface for what it will do is to
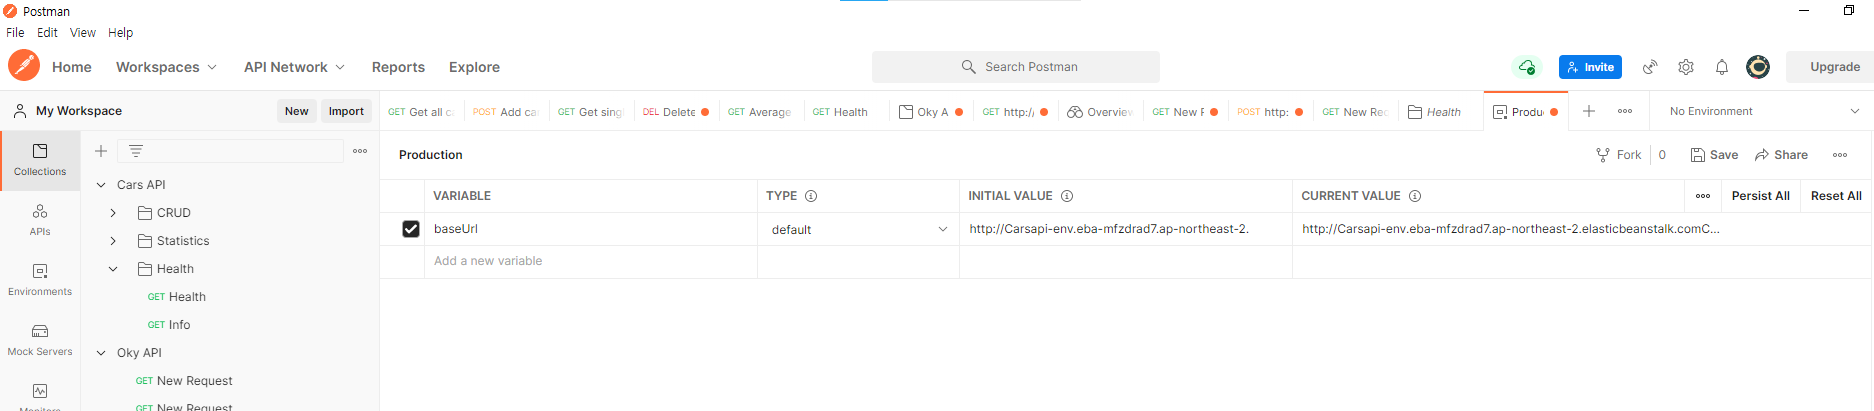
copy this URL and go back to Posman.
In Boston, we're going to click here on this gear in order to manage the environment.
What do you want to do is to create not one additional environment.
So I'm going to copy the localhost environment.
And click on it, call it production.
And now for the address, I'm going to use the address that has been generated from just.
Make sure not to include any new lines or spaces or anything else.
Also, we need to protocol EDP not to access to.
Let's get an update.
And now as we have two environments, we can switch between them, so we said the localhost, I will
select production.
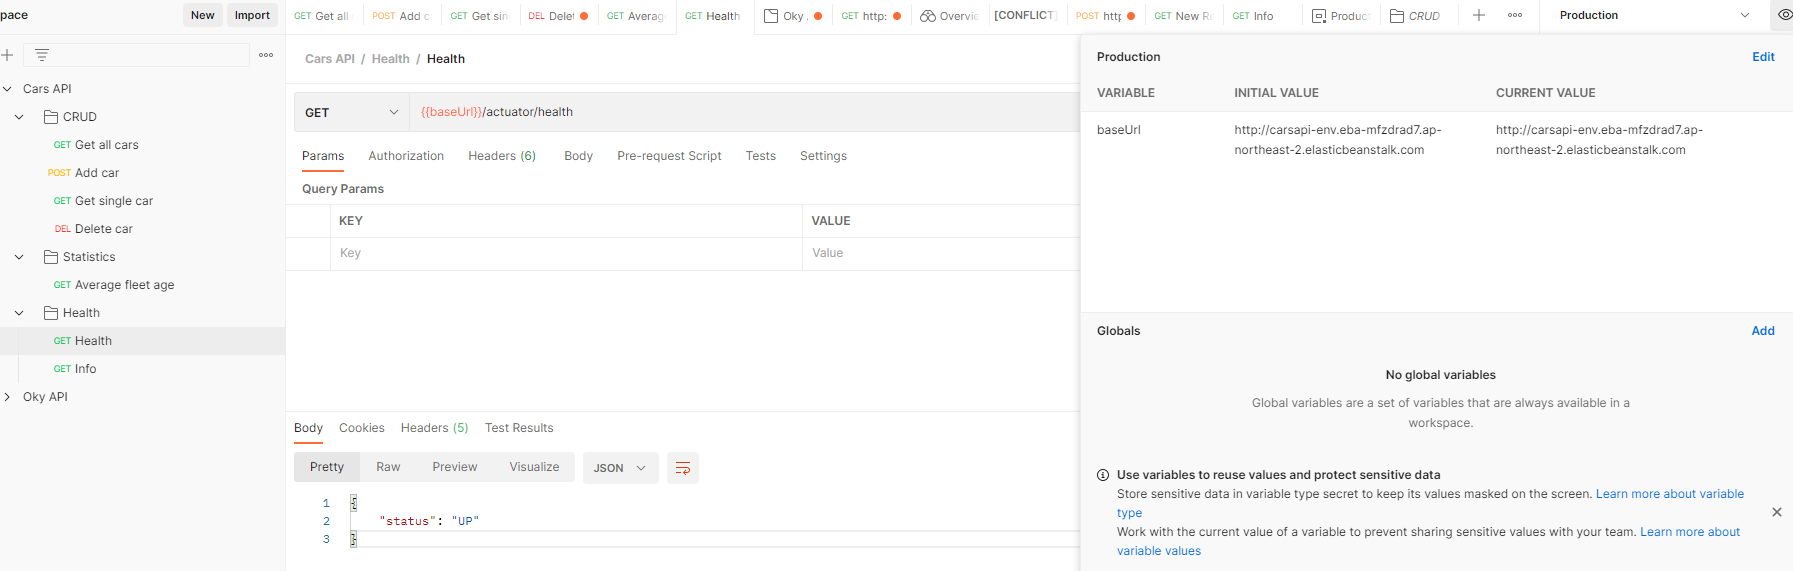
And if I go to health, for example.
I can use this and point.
And now the status that is coming is from the AWB instance that we have deployed.
Let's check if the rest of the API is working.
So what are going to do and Don, I get all cars.
And a new car.
And go back to get old cars and want to see the car here.
So obviously this application has been successfully deployed on AAUW using the elastic Bienstock.
'[AWS] > GITLAB' 카테고리의 다른 글
| 60장. AWS S3 시작하기 (0) | 2022.02.24 |
|---|---|
| 59장. GitLab CI에서 AWS로 배포하는 방법 (0) | 2022.02.24 |
| 57장. AWS Elastic Beanstalk를 사용한 서버리스 컴퓨팅 (0) | 2022.02.23 |
| 55장. Amazon Web Services(AWS)에 대한 간략한 소개 (0) | 2022.02.23 |
| 54장. CI/CD 파이프라인 요약 (0) | 2022.02.22 |

댓글